Dog Grooming Guide
Contents
Many people take their dog to a professional groomer for brushing, bathing, and toenail trimming. But, it isn’t hard to do it yourself, and it’s nice to brush and comb your dog in between grooming sessions. The first step in dog grooming is to teach your dog to accept the attention. Start when your dog is a puppy by handling all his body parts, so it becomes a normal and fun activity. Puppies become accustomed to grooming and as they grow up, won’t fight you at every turn. Puppies are like children and have short attention spans. Select a time when the puppy is less energetic. Begin with short 5-minute grooming sessions. Constantly talk to your puppy in a gentle, reassuring tone while grooming to make him feel comfortable. Be sure to check his ears, paws, teeth, and under the belly during the grooming procedure. In time, this will make him accustomed to being handled and examined. Eventually, he will be quite comfortable being groomed and will look forward to these sessions with you.
Always praise your dog as he is being groomed to make it an enjoyable experience. Keep the tone of your voice positive and upbeat.
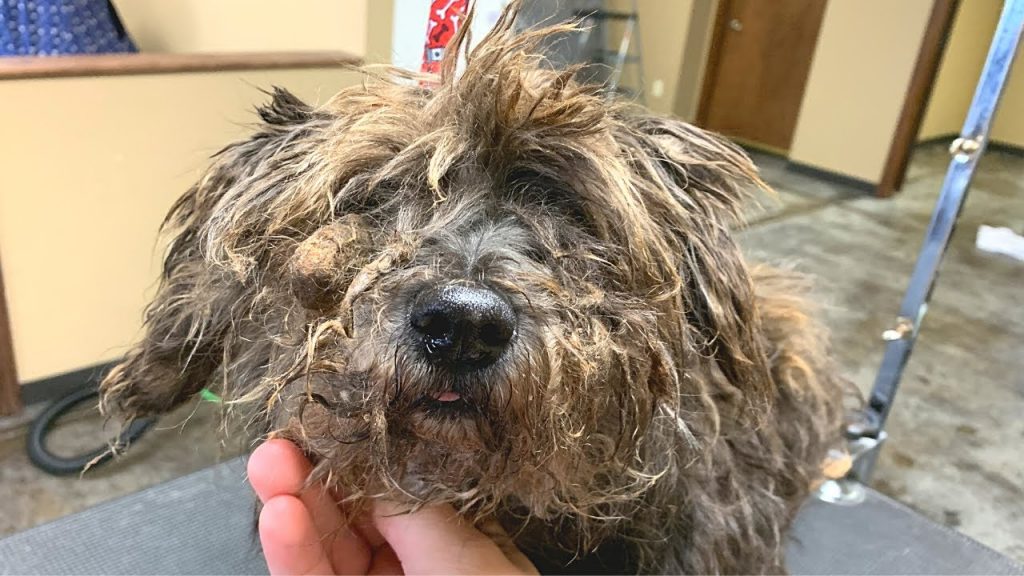
Grooming your dog is quite easy to build into your routine, will give you quality time together, helps to create bonding and trust, and help to ensure your dog remains healthy and clean. You also will be able to check your dog closely for any problems while grooming. Move the hair aside and examine the skin closely for signs of flea, ticks, or skin irritations. Look for any unusual problems with the coat such as mats, tangles, and dandruff. Mats and tangles can be carefully removed while grooming.
Learn where he likes to be combed and brushed, and where he doesn’t. All dogs have sensitive areas that need to be groomed a little more gently and carefully than others. By paying special attention to these areas, you will help make your dog more comfortable while being groomed, and he will not resist future grooming sessions. You will also become familiar with areas that he enjoys having groomed. This is helpful if you need to calm him during stressful times such as veterinary visits.
Regular grooming is essential to your dog’s health and well being. Regular combing and brushing will keep the coat clean and healthy, stimulate the skin, allow the natural oils to circulate to the coat for a lustrous coat, and enable you to carefully check for potentially serious problems. Check areas for hair loss, inflammations, unusual tenderness, or lumps under the skin. Constant scratching by your dog in a particular area may also be an indication of a problem. Check with your veterinarian about any unusual problems found.
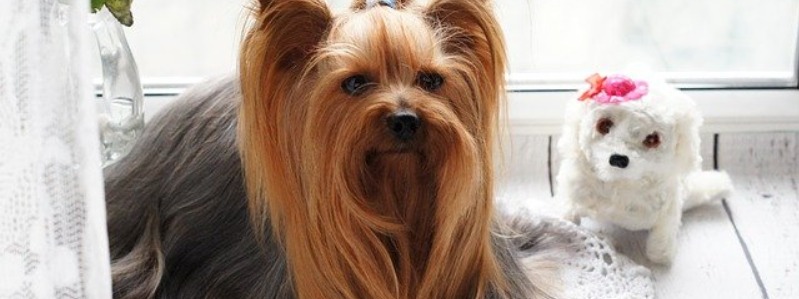
Many dog breeds have a double coat. This is comprised of an undercoat and an outer coat (or guard coat). Dogs with double coats shed all year long, but once or twice a year when the seasons change they blow their coats — shedding their undercoat — and it usually happens in a short period of time. Fur everywhere!
Brushing
Brushing your dog is the most basic and practical step that you can take to keep your pet clean and healthy. Brushing serves several purposes. It removes dirt and foreign objects from your dog’s coat, helps your dog feel well, alerts you to skin health problems, and cuts down on shedding. Use a brush that has been made especially for dogs, because it will be the proper design for dog fur and skin.
Brush and Comb Types and Styles
- Dogs with short, smooth coats: Use a soft-bristled brush, that will easily remove dead hair and help spread body oils over your dog’s coat, creating a healthy gloss. Bristle brushes have soft straight bristles on a flat base. Because this design doesn’t penetrate as deeply as others, it works best for short coats. Or use a ZoomGroom rubber dog brush good for short coats. It has a nice massage feeling and collects hair like a magnet.
- Dogs with long, wavy, or wire-haired coats: Use a pin or wire brush. The pins will go deep enough to pull out the dead hair that causes matting. Pin or wire brushes have straight metal bristles on a rubber base. This brush provides deep penetration and is excellent for fluff-drying long fur and heavy undercoats.
- Dogs with long, curly, or silky coats: Use a slicker brush. They have a flat, rectangular head, and bent wire bristles that remove curly tangles and keep straight coats soft and shiny. A slicker brush is the most versatile tool, working well for a variety of coats. The short, bent, wire bristles grab and remove loose undercoat hairs, and frequent use helps prevent matting.
- Dogs with especially dense, heavy fur: Use a wide-toothed metal comb, which will go where no brush can possibly reach. The more teeth there are on the comb, the better a job it will do at getting rid of dead hair. Shedding blades also work well on dense heavy fur.
- Dogs who hate to be brushed: Use a grooming glove. They have semi-soft rubber nubs on the palm and for your dog, it feels like being petted instead of brushed. This glove works best on short coats, but the sensation of being petted makes it a favorite of all dogs!
If your dog has a brittle and dry coat, to prevent fur breakage, dampen fur with a little water or conditioner, before brushing or combing. Let your dog sniff the brush and comb before you begin grooming, and then talk to your pet in a reassuring tone while grooming. If the grooming procedure is made comfortable for your dog, he will begin to look forward to regular grooming sessions. While brushing if you see skin problems such as cuts, bumps, rashes, scabs or parasites, have your veterinarian examine your dog.
When to Brush a Dog
Dogs with long coats should be brushed daily. Short-haired dogs may only need brushed 2 – 3 times a week. How often you need to brush and comb your dog depends on his coat and lifestyle. Dogs with longer fur that spend a lot of their time playing outdoors typically require the most grooming. If you’re unsure how often to brush your dog, ask your veterinarian for his advice.
Always brush your dog before you bathe him. This loosens dirt and dander from his coat, helps you spot and remove any foreign objects, and removes dead hair. Brush your medium to the long-haired dog each time he gets wet to prevent matting.
How to Brush
Begin brushing at the head, working toward the tail and down the legs. If you begin by brushing in the opposite direction of your dog’s hair growth, this will help loosen dead hair. Afterward, brush the same direction his fur grows, paying particular attention to the legs and flanks, and areas that easily mat. A pin brush can be used to fluff the coat by brushing against the direction of hair growth. Regular brushing will help distribute the natural oils in the skin, producing a healthy, shiny coat. Brushing several times a week is recommended for most dogs.
If any of your dog’s hair is matted, fix the problem as soon as possible, because matted hair can lead to skin irritation. First, try to gently remove the mat with a comb or your fingers. Sometimes matted hair must be cut out with scissors, but be sure to use blunt-tipped scissors, so your dog doesn’t accidentally get a puncture wound if he moves while you are cutting.
Combing
First, brush your dog’s back with a pin-brush to smooth his fur. Use a metal dog comb, then starting at the tail, take a small amount of fur and comb backward toward the tail. The comb should touch the skin. If you run into tangles take less fur, or turn the comb and use the end to break up the tangle. Continue working toward the neck, always combing backward. When you are done you should be able to run the comb easily from neck to end of the tail.
Fluff the fur on his legs starting at the bottom and working your way to the top. Start at the foot and take small amounts of fur and comb towards the foot. The fur is thinner on the legs, so do this very gently.
Comb his sides with the same procedure and work your way up each side. Use the same procedure on the neck, working your way from the base of the neck to the head. Then comb the belly (very gently as this is a sensitive area). Gently comb his face if he’s a long-haired dog.
Use a metal flea comb to check for fleas by combing through your dog’s coat in all areas. Keep a container of soapy water nearby for any fleas.
The Dog Bath!
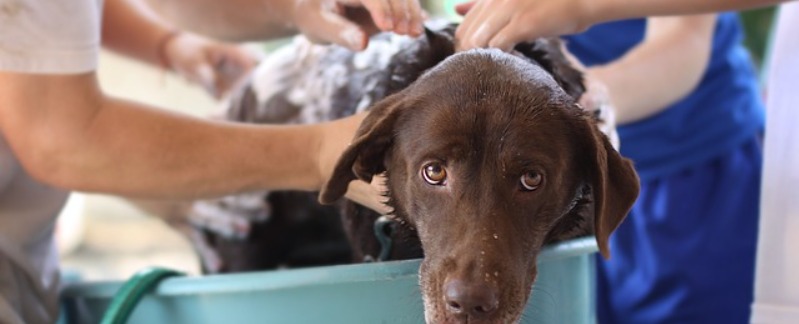
Your veterinarian will let you know how often you should bathe your dog. To keep your dog’s skin healthy, bathe only when necessary so you don’t remove natural oils, because this results in dry skin, rashes, excess shedding, and a dull coat. Ask your veterinarian for recommendations on frequency. Small dogs can be bathed in the kitchen sink… larger dogs need to be bathed in the bathtub.
The first few times you might not even wash him. Put him into the sink or bathtub without water, give him a treat and tell him he is a good dog. Then remove him from the area. Do this each day for 2 – 3 days before actually getting him wet.
Before bathing your dog, brush or comb him out to make sure he is free of mats, which will only get worse when wet. Brushing or combing before the bath will help loosen dead fur also.
Warm up the area where you will bathe your dog. Gather all the supplies needed before beginning. Always use a shampoo created especially for dogs, because the pH level of your dog’s skin is much different from humans. You’ll need doggy shampoo, conditioner, a bowel or bucket, towels, and cotton balls for inside his ears. Or keep your dog’s ears as dry as possible with a Disposable Pet Shower Cap.
Lay a Cushioned Shower Mat inside the sink or bathtub.
Make the water warm — not too cold and not too hot. Try not to get any water on your dog’s head and face. You can use a warm wet washcloth or baby wipe to clean his face. Soak your dog with water down to his skin from neck to end of the tail, legs, belly, and sides. After your dog is good and wet everywhere, add doggy shampoo to his entire body. Then with your fingers lather (massage) your dog so he is nice and soapy. While bathing your dog, praise him a lot.
After your dog is soaped up and clean, it’s time to rinse with clean clear water. Rinse, rinse, and rinse again using a large bowl or bucket. Or use a shower spray head to saturate his coat and remove all soap. If you use a doggy conditioner after he’s completely rinsed, either leave it in or rinse it out according to the directions on the label.
Run your hands over your dog to release as much water as possible. Then towel dries your dog from head to tail, legs, feet, and pads. As you dry your dog, brush him. When finished offer a treat. Keep your dog inside until he’s completely dry so he doesn’t get chilled.
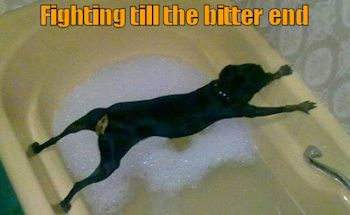
Trembling is not uncommon for a dog during a bath, and expect him to do the body shake to release soap and water from his body, so be prepared to get wet!
If you want to give your dog a bath outdoors, be sure the weather is warm and there is no wind. You can use a child’s wading pool with a nonskid mat on the bottom.
Nail Care for Dogs
After the bath is a good time to trim his toenails as they are still soft from the bath. Regular nail trimming is important to your dog’s health and well being. If you let nails grow too long, they will begin to curl under, making it difficult — and sometimes painful — to walk. Also, the longer you let the dog’s nails grow between clippings, the longer the quick will get, making it more of a challenge. Therefore, it’s simply easier to keep them trimmed.
Never use ordinary scissors to trim your dog’s nails.
Nail trimming tools you can use are dog toenail clippers, a Dremel grinding tool, and a dog nail file.
With a toenail clipper, hold the dog’s paw firmly, and cut off the tip of the nail with a single stroke.
With a grinding tool, hold the dog’s paw firmly and grind gently on each nail for a few seconds, because it will get very hot. Move quickly from 1 nail to the next. Be careful not to catch the hair in the grinder. To prevent this you can push the toenail through old pantyhose prior to grinding.
Be very careful to stop short of the blood vessel (quick) inside the nail. If you mistakenly cut the nails too short, stop dog nail bleeding with styptic powder within reach to stop bleeding should you cut into the sensitive quick (the living portion of the nail that contains blood and nerves)? Don’t forget the dewclaws!
Finish trimming by filing your dog’s nails with a dog nail file to make them nice and smooth.
Learning to clip your dog’s nails can seem daunting, but it’s not that hard if you know what you’re doing, and you let your dog get accustomed to it gradually.
Most dogs will need their toenails trimmed once a month. Puppies toenails grow fast, so make sure they don’t get too long. Some dogs get very wiggly, so you may want to have your dog held by someone and you trim or visa versa.
Teeth
Your dog’s teeth are very important for good health, as oral problems can lead to very bad breath, as well as problems with the heart, liver, kidney, and even brain. To brush your dog’s teeth, buy a cleaning kit that includes a dog toothbrush and special dog toothpaste. Most dogs like the taste of this special toothpaste, which is usually chicken, beef, or peanut butter flavored.
In the beginning, you won’t be brushing your dog’s teeth. Put a little bit of dog toothpaste on your finger, place your finger in his mouth and let him get a taste of the delicious toothpaste. Your dog will love the taste! Do this for a few days in a row. Then you will progress to very gently rubbing his gums with your finger and the toothpaste. Then start brushing a few teeth with the toothpaste and gradually build up to a regular brushing routine. Soon you will be brushing about twice a week. No, you don’t need to floss!
Eyes
Clear mucus secretion is normal. Every day, wipe with water on a soft, damp cloth, cotton swab, or use a wet wipe. If the secretion smells bad, is yellow or bloody, your dog should be taken to the veterinarian right away, as this means there is an infection. If your dog has long hair that grows into his eyes, trimming is best left to the groomer.
Ear Care for Dogs
A healthy dog ear is pink in color and has no smell. A little bit of wax or dirt in the outer portion of the ear canal, and around the ear leather wrinkly area is perfectly normal. You can remove this with a piece of gauze, cotton ball, or a cotton swab (Q-tip). But never push a Q-tip inside the ear canal!